I'm here to tell y'all about...
Read MoreY'all Need to Know About
Repurpose & Rehabilitate
I'm here to tell y'all about...
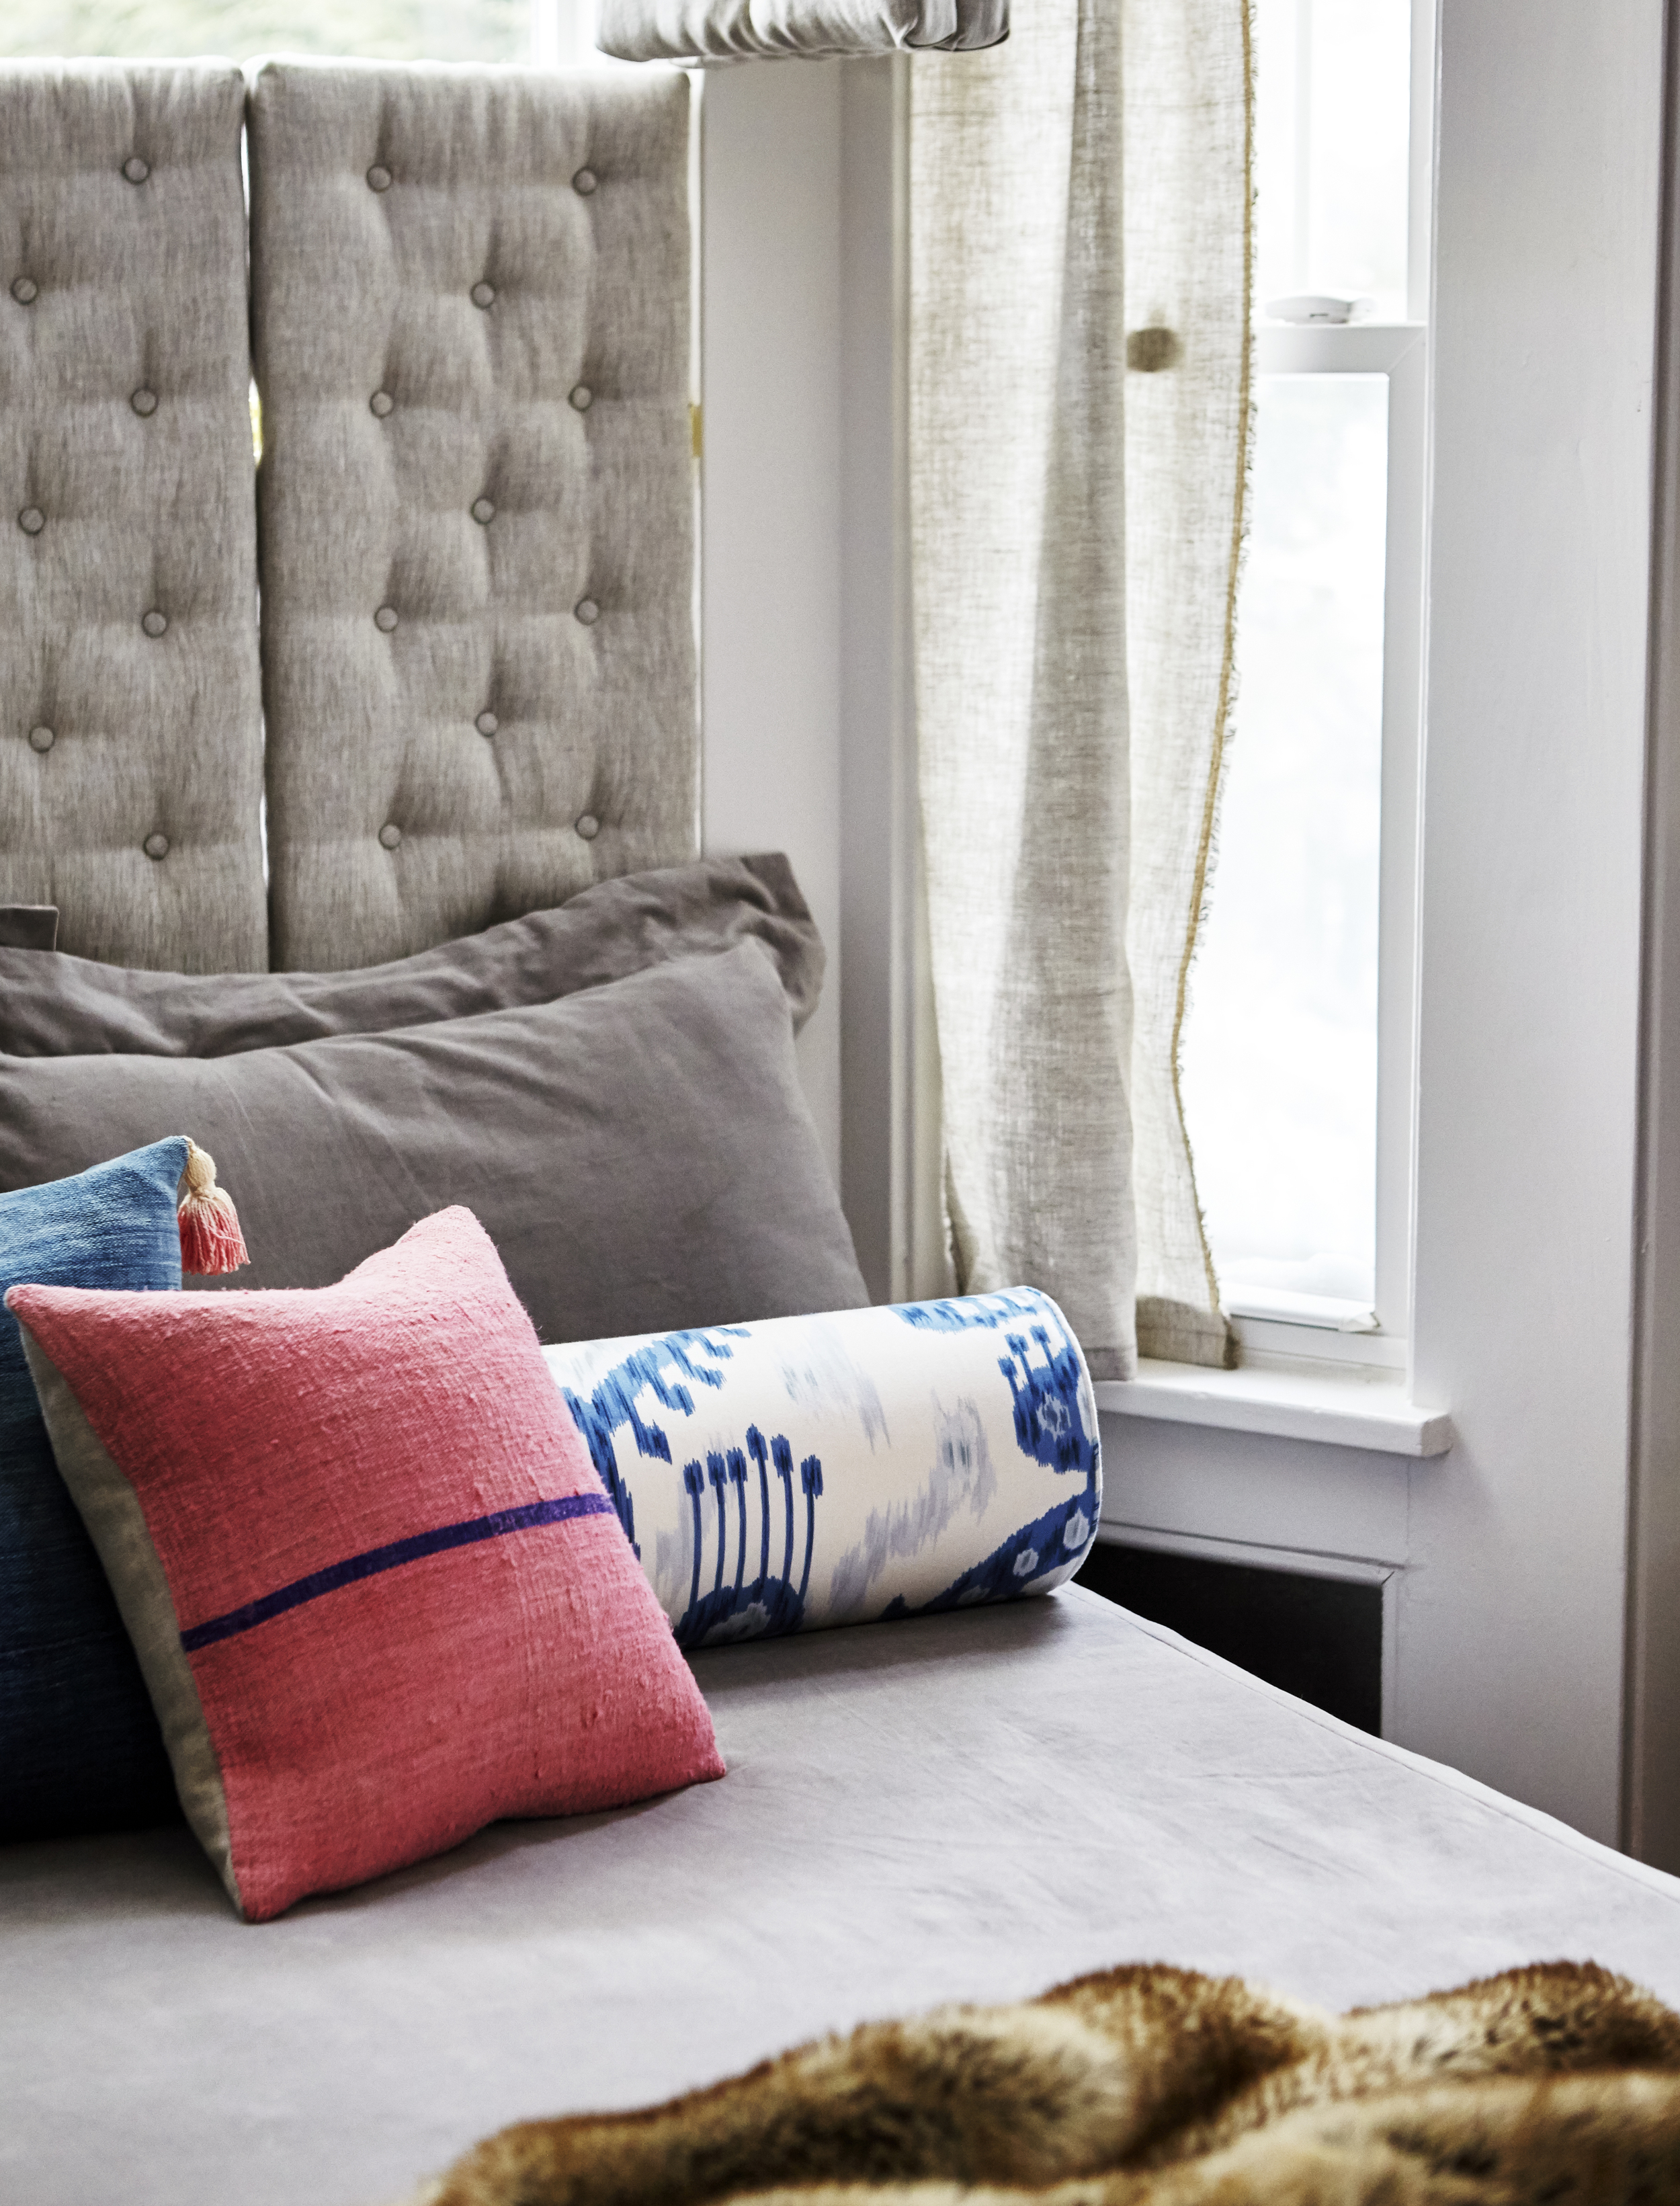
Read MoreGuest bedroom interior project REVEALED
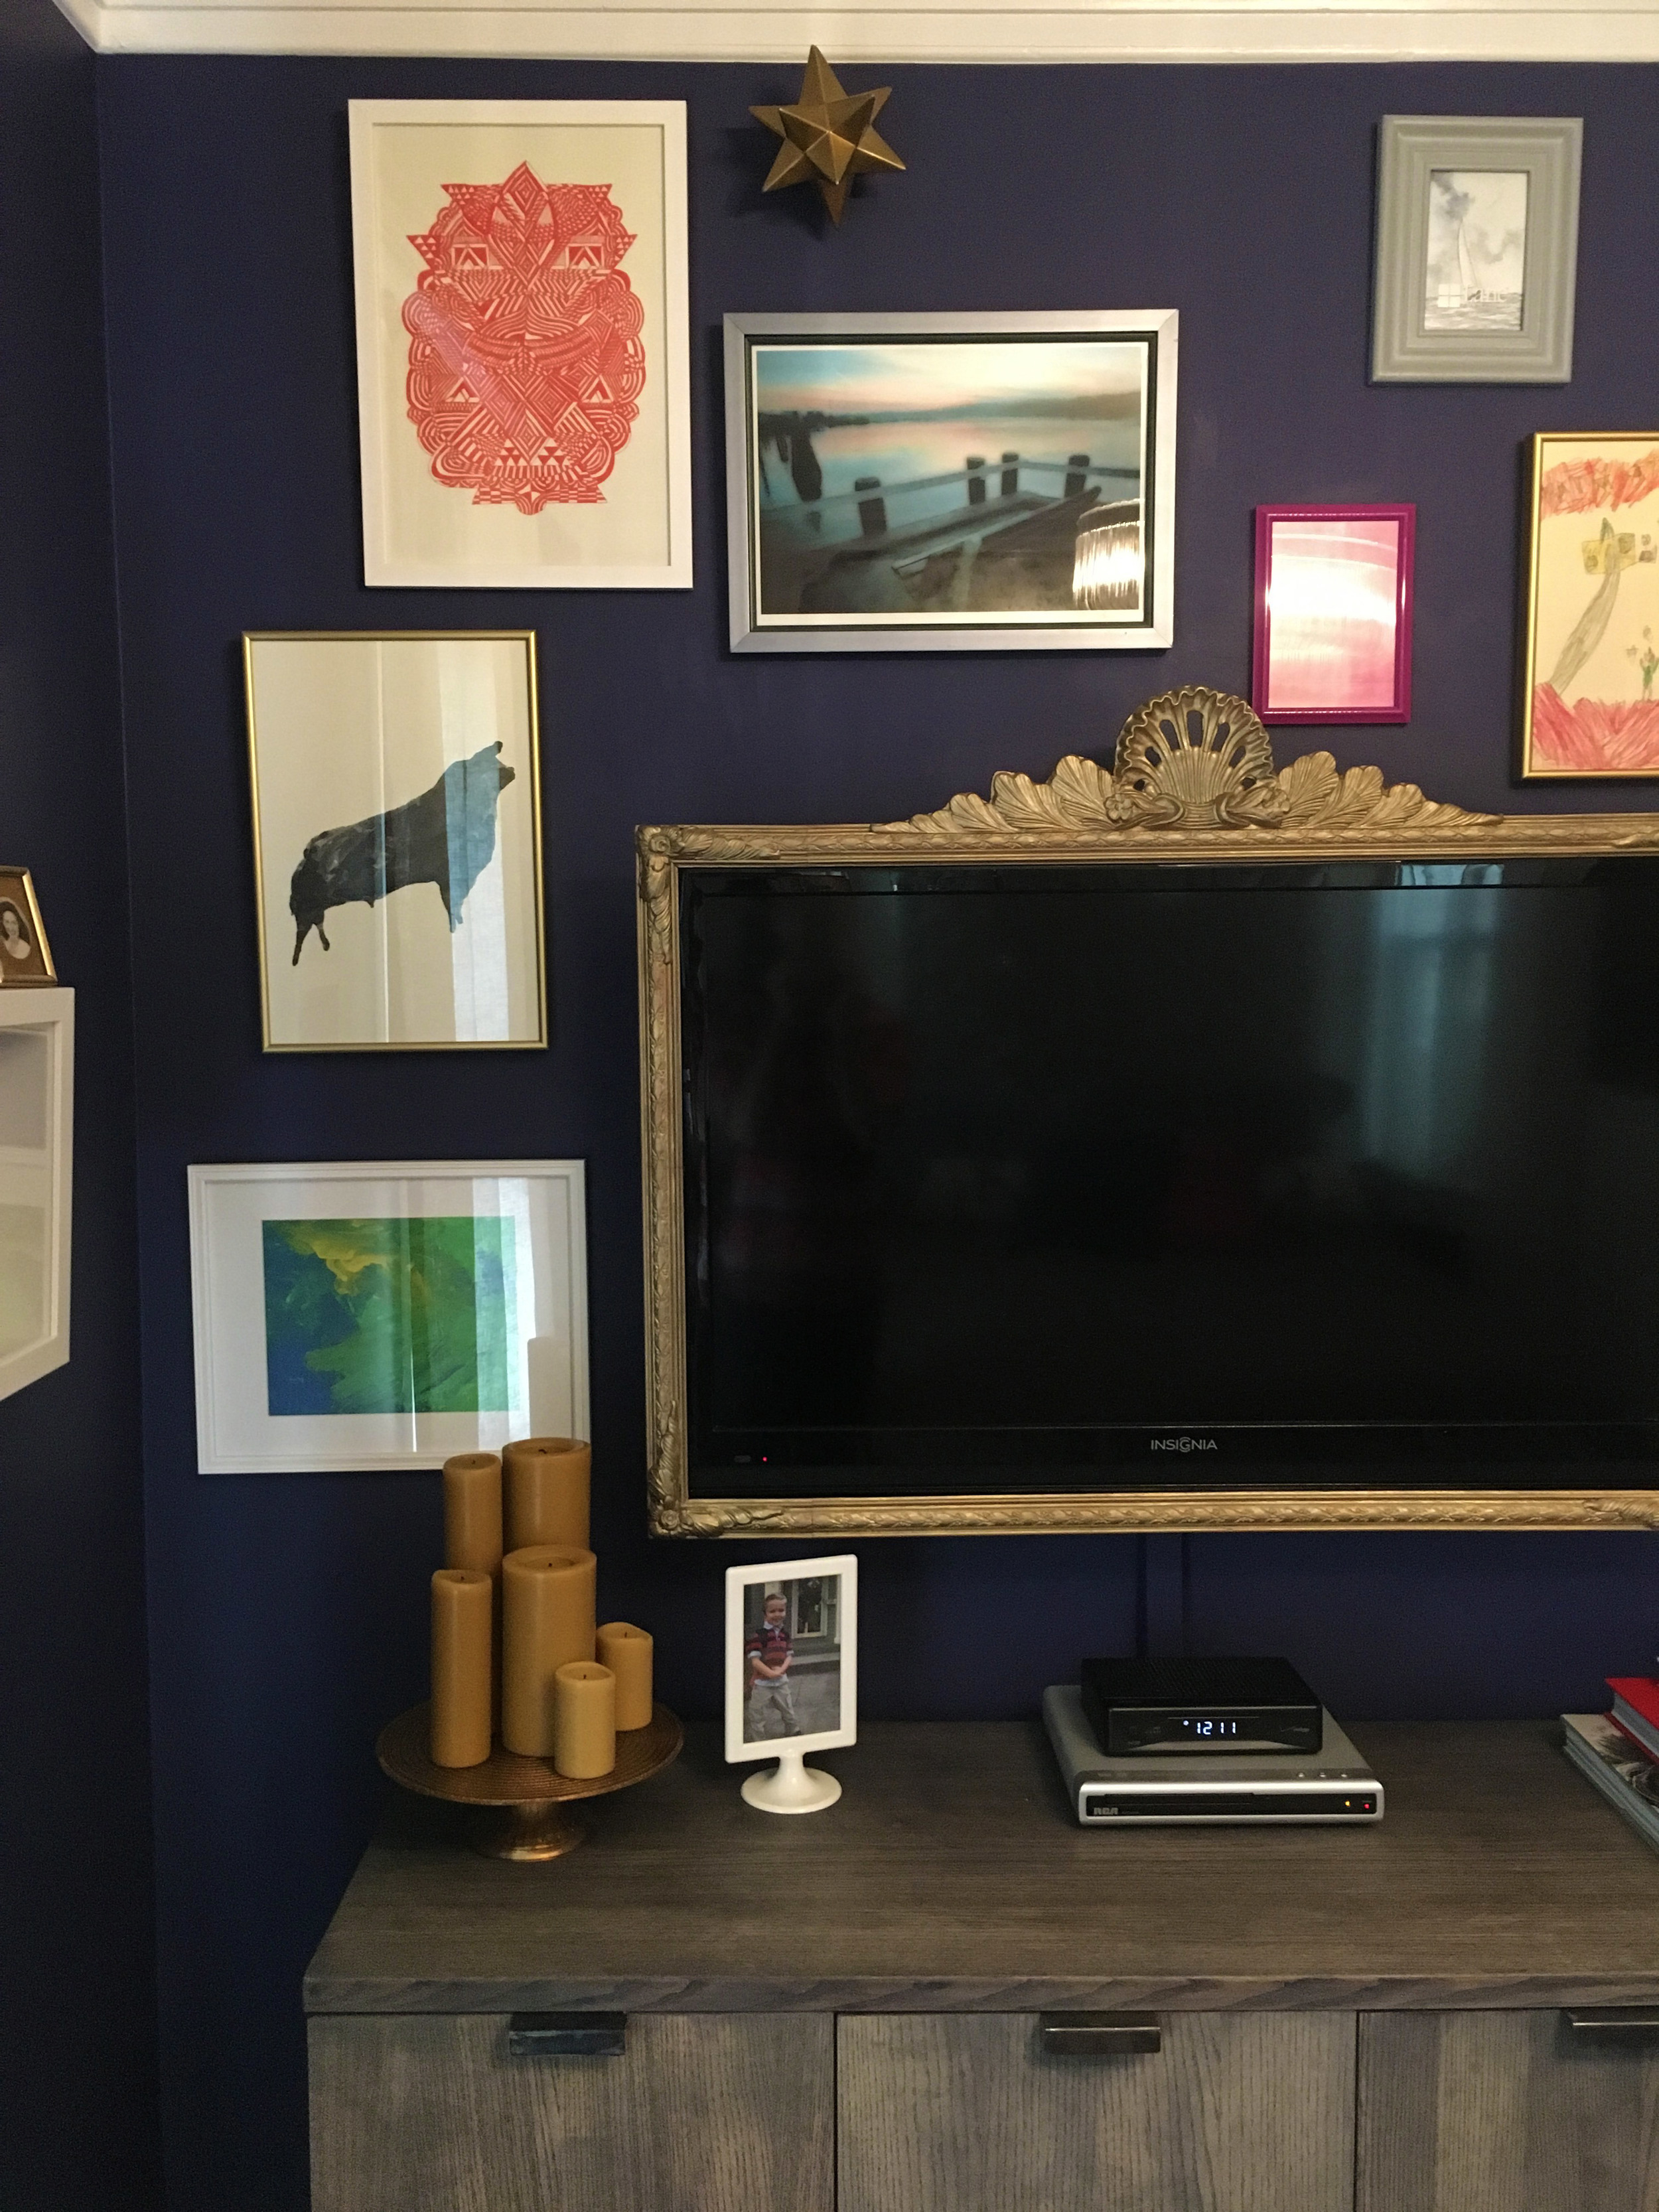
Read MoreY'all, your tv doesn't have to be an eyesore any more!
Read MoreThis wallpaper just turnt out a 90's powder room...
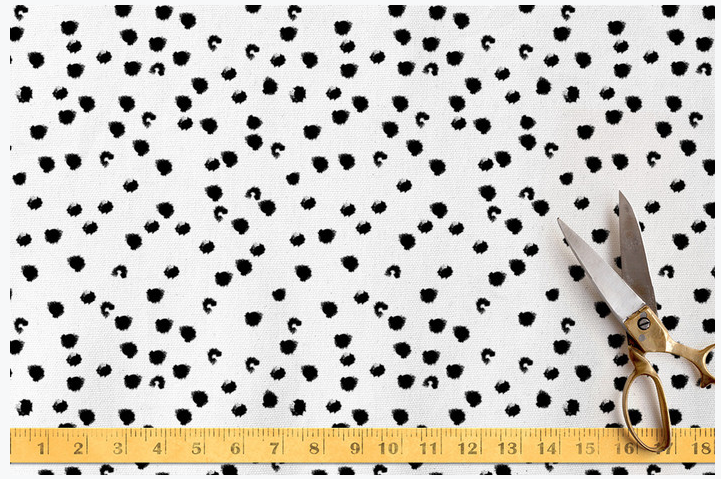
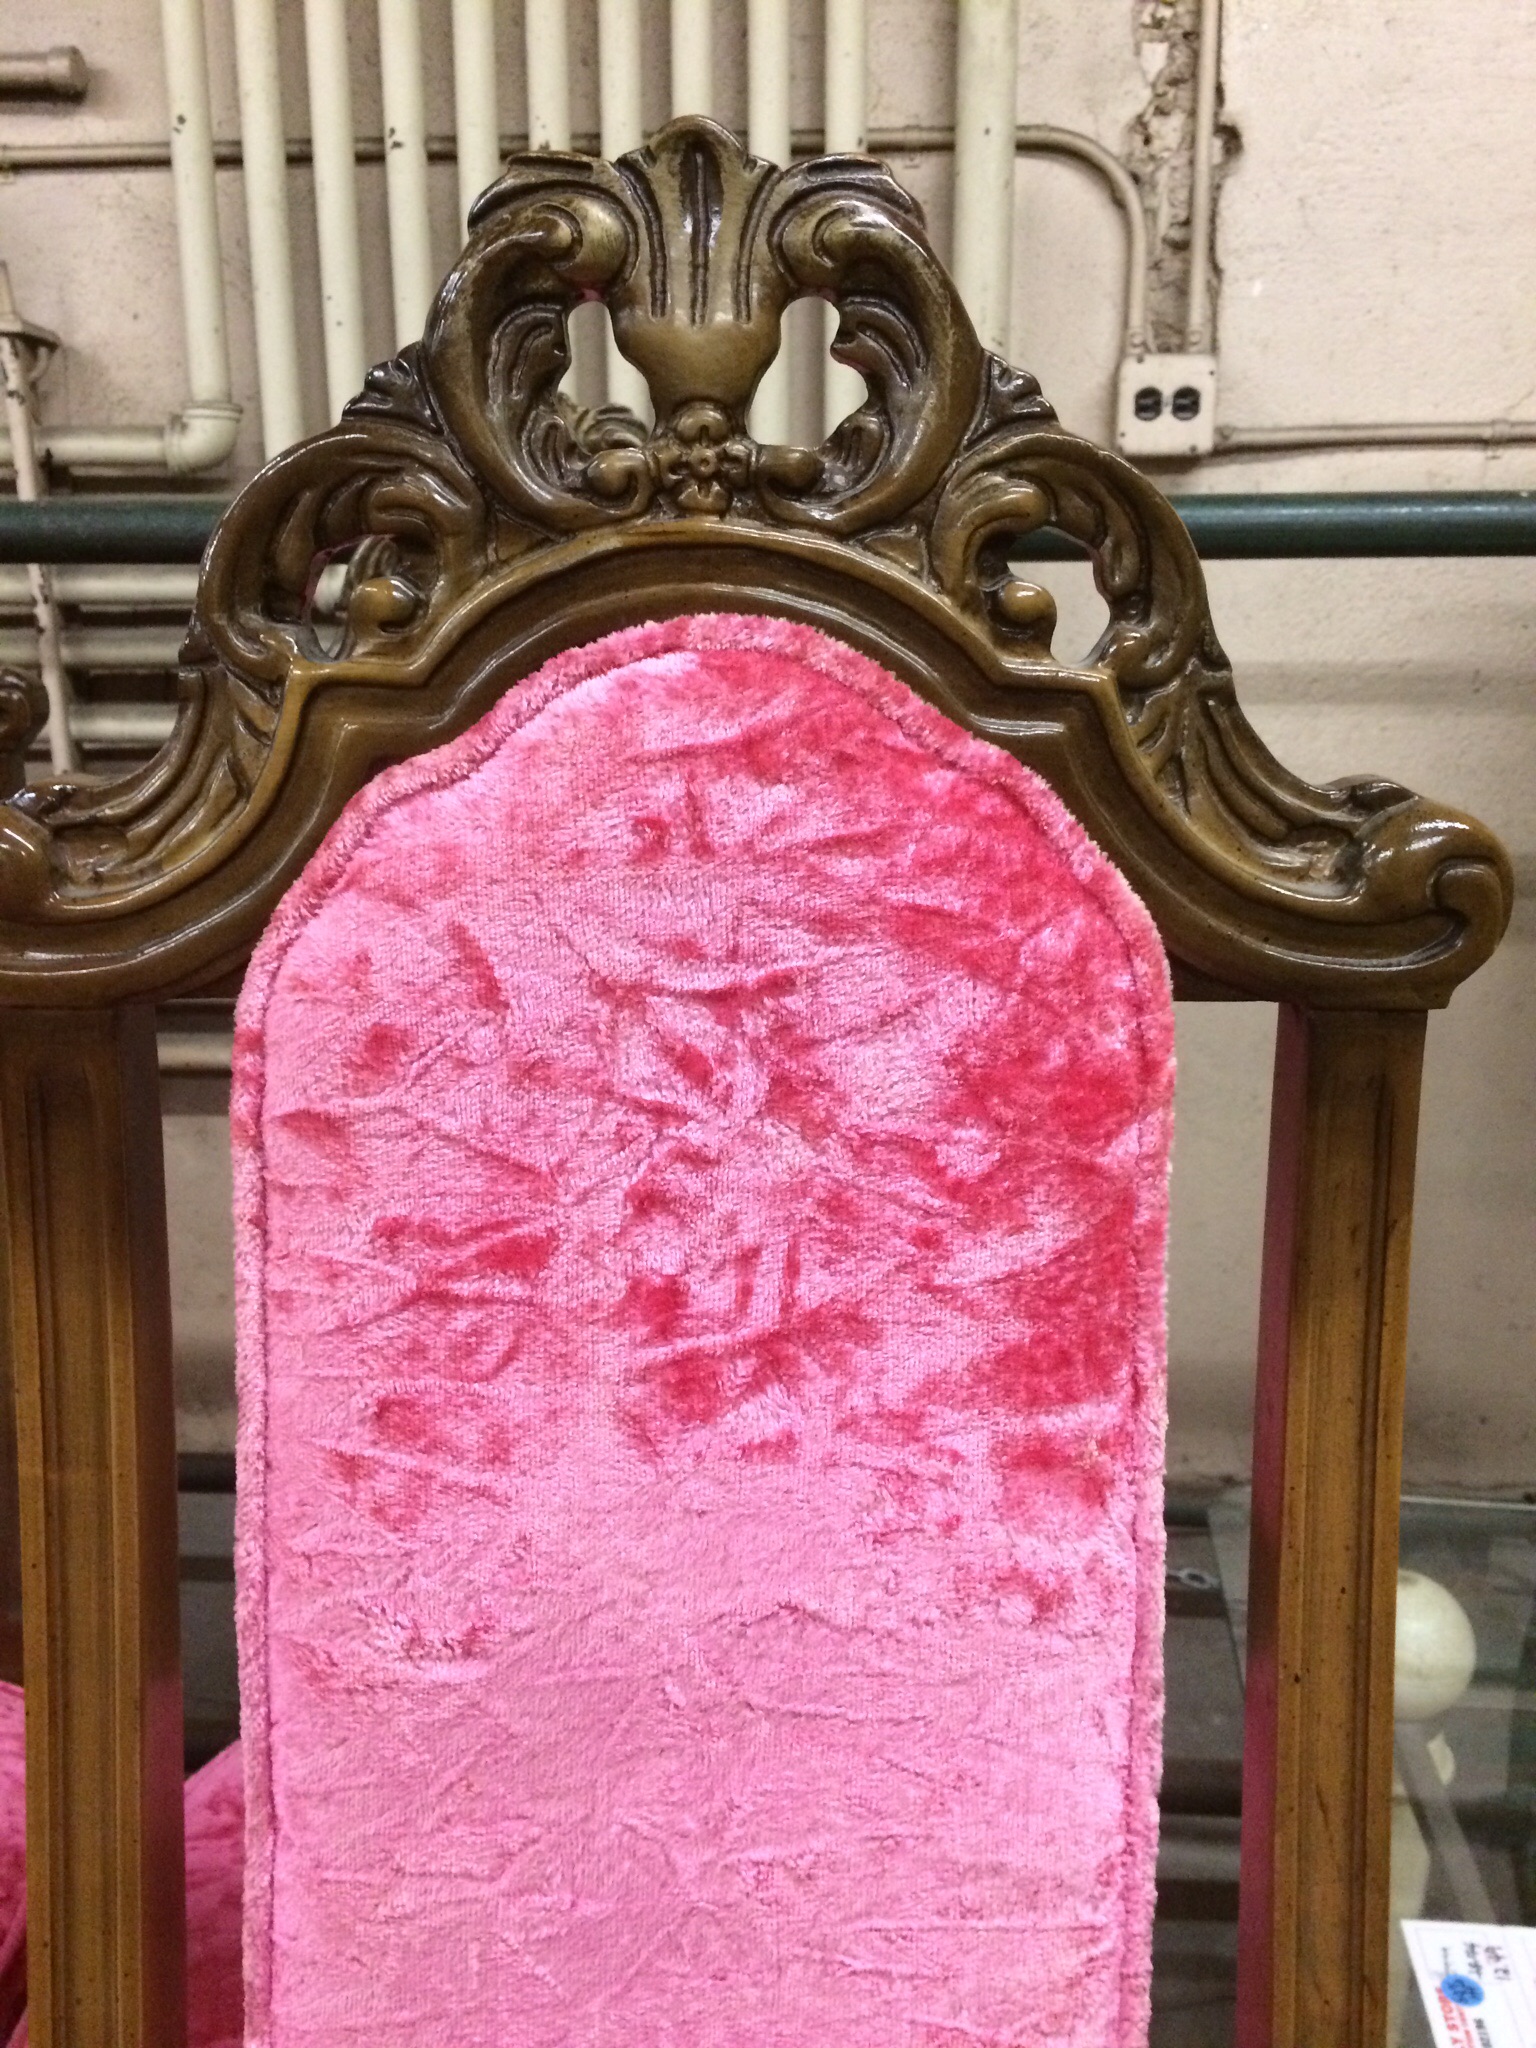
Read MoreToday = this uh-maaze fabric + a Free Shiot Friday found chair! Check it!
Read MoreIt's Thursday and this Thrift Whore has been naughty...
Read More
You'll never look at your vintage silver the same way after reading this...
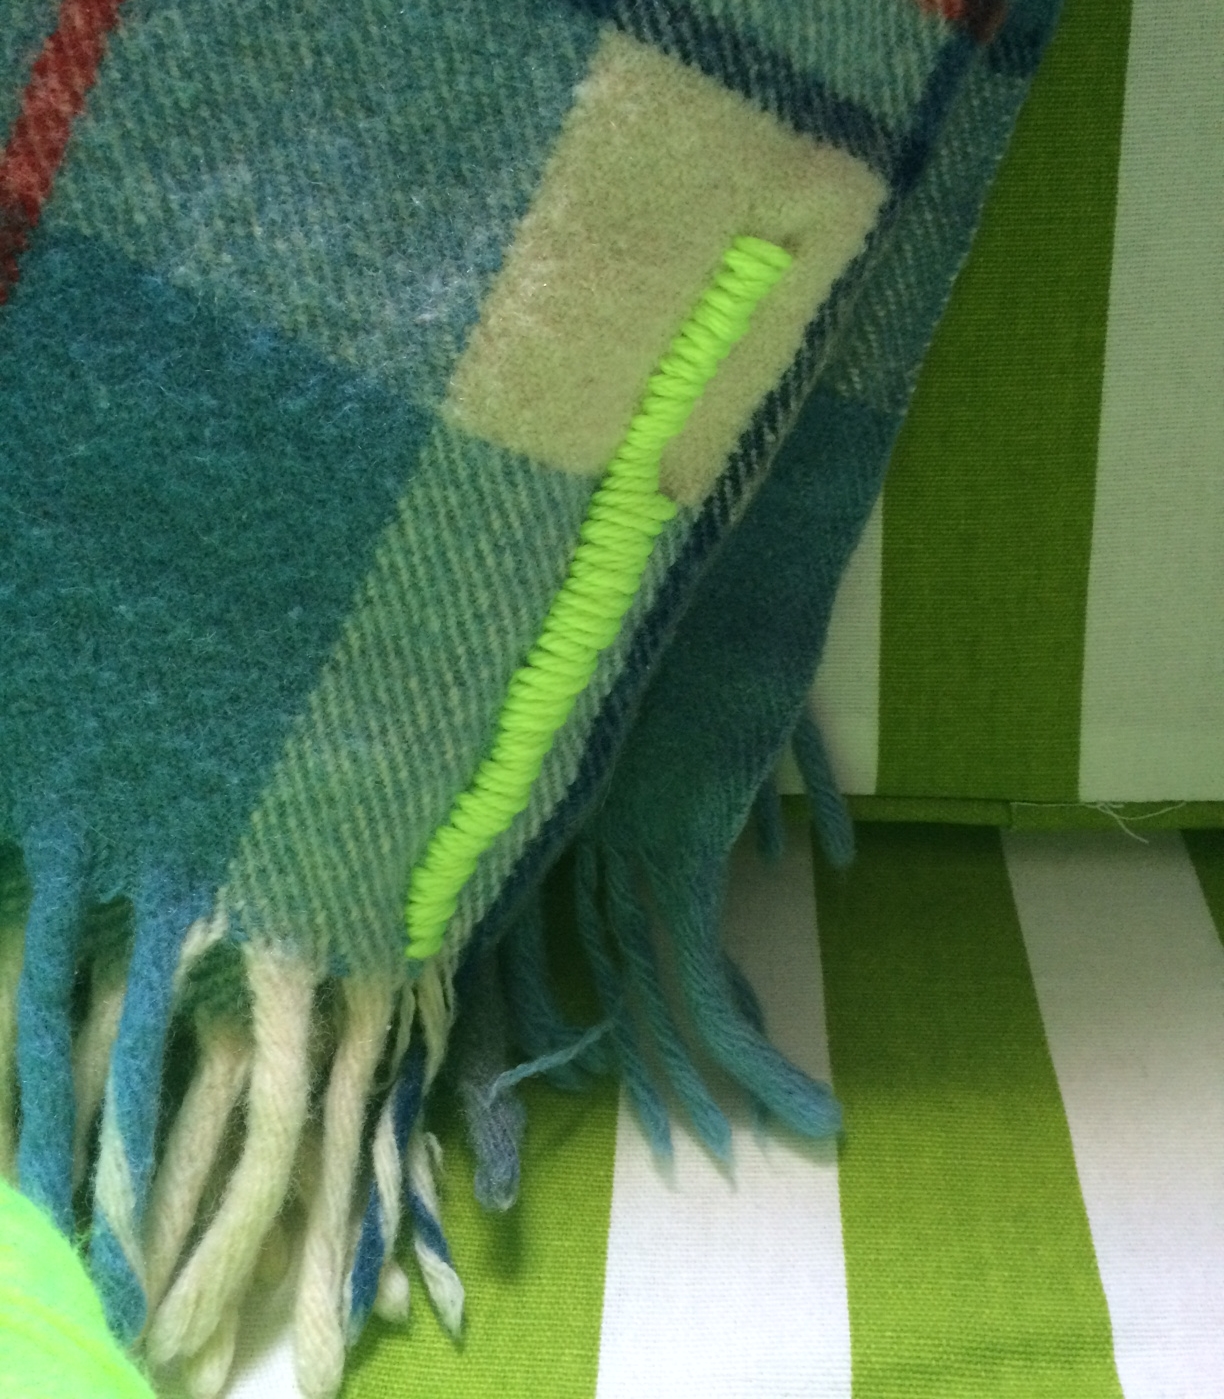
Read MoreDon't let a rip ruin your day...stitch it up in NEON!
Read More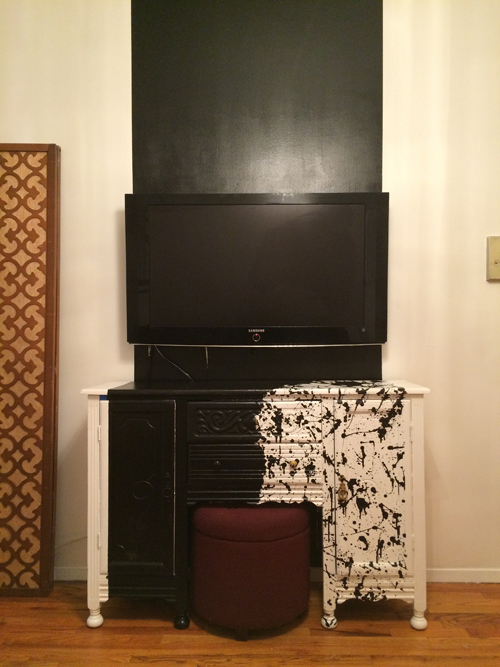
TV's are usually ugly, so put it on something chic...
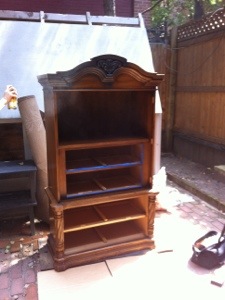
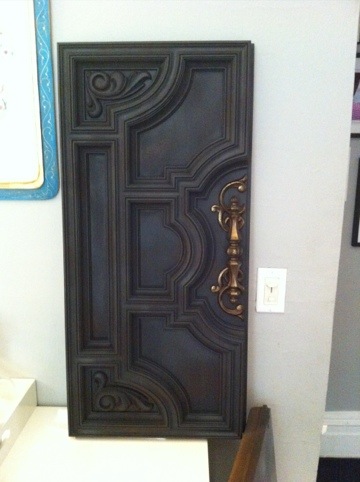
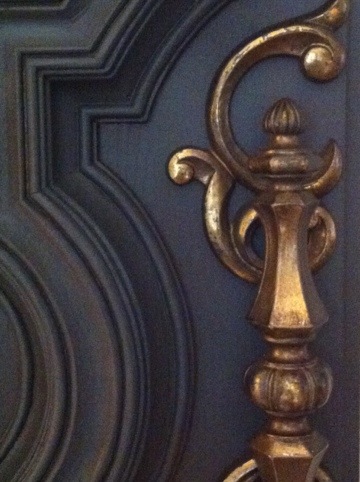
Read MoreThese two...chic and FREE...but just wait til y'all see what I would do with them...
Read MoreThis is a bulletin board. AND a WERK of ART! Y'all need to make one ASAP!
Read MoreBlume is an amazing clothing brand that offers personalized patches on everything from tshirts to burp cloths and underwear for him and her-- check out the 'licious link above!!! Created by friend & dynamo Stacey Blume, I was asked to serve up some sass & style for her booth at a recent Children's trade show. The goal: focus and unify the Blume brand into a visual and cool physical shopping experience for buyers-- all on a considered budget. Here's what went down:

These hawt vintage industrial sewing machines/tables were re-purposed as chic 'order-taking' tables in the booth. These were an awesome score, y'all, b/c not only were they FREE, but they were once in use at Stacey's family's uniform manufacturing business. After a thorough cleaning, and the machines were carefully removed, they were prepped for a spray job:

We wanted the original gray metal bases on each table, as well as one of the lamps left 'as is', so all that stuff was draped & taped off, in plastic. The table tops are some sort of formica and though cute, they needed some LIFE.

Of course that means paint those biotches RED-- oh and red just so happens to be in Blume's logo:

Remember when spraying to make even passes back and forth about 8"-12" from your surface, y'all. Look at all this yummy:


I mean...these tables are just LIVING! When paired with our industrial chairs, industrial rolling racks, c-clamp hanger displays, signage and hand-painted red stitch trim detail, the place went OFF and this happened:


I'd say style and sass has been brought-en!
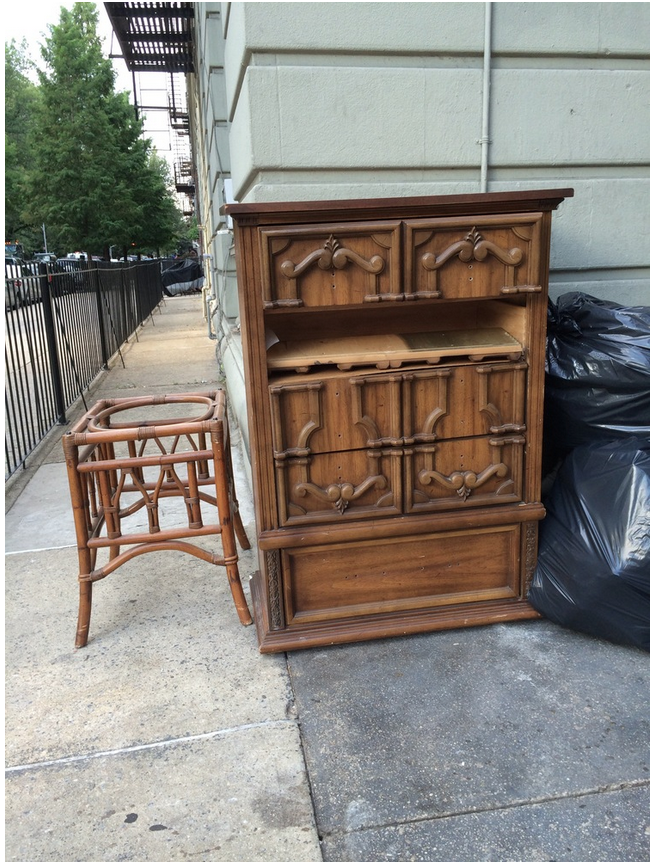
For some HOT Before and After action up in this 'dazzle, what...THRIFT WHORE THURSDAY!?!This thrift store armoire was scored for a client while out whoring weeks ago:

Don't be shy babydoll, we need to see the goods:

Here's where we are today:

And:

YES, y'all! This armoire has been totally tricked out: new paint job, drawers lined in pink felt, custom mirror added to the inside back topped off with some interior lighting chic-ness!


The client is just thrilled beyond belief with how this turned out and so am I...just goes to show y'all what some good honest thrift whoring can do for your lives...happy whoring!
Y'all here's a quick update on the armoire makeover:

Refresher: I'm repurposing this thrift store armoire into a bar & additional dining room storage for one of my clients. It's a beast of a thing, and has been soaking up paint like a sponge, but we're getting there...

I just can't gush enough about this idea-- I'm forever seeing these old wardrobes/dressers, entertainment centers, or even china cabinets, at the thrift stores, for next to nothing-- our dude being tricked out here was a mere $69!!! How appropriate! Scandal!!! With some elbow grease and creativity, y'all can totally customize them to suit the task at hand...my client wanted to be able to shut away the bar & be able to store entertaining extras so if the need arises, they'd all be close at hand...these drawers ought to help her with that, especially when they're lined in this amazing hot pink felt:

I simply used spray mount on drawer bottom and carefully smoothed out the felt towards drawer edges. Next, i slowly trimmed along grooves with exacto knife and scissors, tucking any frayed edges into drawer seams...felt realness:

One down, three more to go!!! I've also got some plans to make the bar nice and glam...Check back for HOT after shots soon!!!
 So y'all know what that means? Time to get your drank on!!! And it just so happens that I'll be enjoying mine from my new bar cart! Oh shiot, lookee here...warning...HOT AFTER ACTION:

This is probably one of the easiest diy's I've ever done! And I just j'adore how it turned out...It's amazing to me how you can completely transform something from it's intended purpose into something else entirely-- with the easy addition of some custom cut glass.


Here's how I made this all happen...
*Create a template for the area that you wish to put glass atop/on. If you're blessed to have a cart with a square or rectangular situation, then this project is even EASIER and you're a biotch! BUT, if, like me, you have an irregular shape that you're working with-- pear, rotund, obtuse c'ankle-- what have you...then y'all have to make a template for glass cutter to work off. I made mine out of craft paper.
*Next cut a rough approximate shape from paper. Holding that shape firmly in place, trace the underside/bottom edges of the basket where your glass will eventually sit inside of. Make sense? This allows ya'll to get the exact shape of the area you want glass cut for.
*Lastly, trim off about 1.5" more from the tracing line you just made in the paper edge with scissors to allow for some clearance of the glass, so it won't scrape against the metal of the cart, once cut. Now you've made your template, which should look something like this:


And there y'all have it! Remember to always measure twice (or even three times) and cut once. Also, as a back-up back-up, if you're just nervous as all hell to trust your template-making skills, you can always bring your cart to your glass cutter. Y'all want at least 1/4" thick glass with a safety edge. My two pieces ran me about $60/each...so, not dirt cheap, but not cra cra either. And this little lady may not always be just a bar cart in my space-- she can now become a side table or console of sorts, etc...so the minimal investment has yielded double and potentially even TRIPLE value, y'all...and that's not something we take lightly here at Blog-A-Dazzle!!! Triple Value!
 Cheers!
Ok, soI know it's like 12:30 AM, and, yes, I've enjoyed some tequila..,but I've still got my wits about me to share the progress of the armoire makeover with y'all...I mean, look at this shiot:

We tested two different colors, both grey, but clearly this is the one carrying the golden torch:
 Damn! This grey man is HOT, right?!? Look at more hotness:
 And look how chic this paint treatment gets when I add the hardware:
Whoa, is it really Wednesday, already, y'all?!? Damn! While out sourcing rugs for my latest design gig, I saw this incredible window display for Fishs Eddy & just had to share:

Well, just gag me with a spoon (uh huh, had to go there, y'all) this is genius! Not sure how long this took to execute, but it's just incredible!

If it's not obvious, Fishs Eddy is a kitchen and tabletop housewares store in NYC that carries the cutest stuff and is always so well merchandised! Consider y'allselves served!

Y’all, there’s been a lot of glamour going on in my world recently, so please forgive my lapse in posts. The biggest is that we’ve moved into a new apartment, which y’all will be learning a lot more about right here... holla, new decorating hijinks!!! The other is the completion of our first episode in a new web-series I’ve developed called, Style Rehab. If the title doesn’t convey it enough, it’s a show about stylish ways to rehab, or rehabilitate, one’s space. Our first episode features Andrea, who’s in dire need of some craft corner style love. Watch and enjoy and of course, I welcome your comments! And if any of y’all are in need of a serious intervention, Style Rehab is taking on new patients! Send me an email of your ailments, we’ll get you good and fixed-up!
Y’all know sometimes you just can’t control exactly when or where you’ll want to bust a move…like at your local Home Depot, where on another makeover visit with Disa in Maplewood NJ, she tore up the plumbing aisle with some dancing glory! Check it:
I have no idea why I’m whispering in that bit, but it sure does add some drama!
And y’all aren’t going to believe the amazing industrial glassfront cabinet we scored at this wonderful architectural/found object shop called, 2 Guys From Newstead! This place wasn’t even open when we first pulled up, but after witnessing my total freakfest through the windows, complete with shrieks and lots of arm flailing, they opened right up! That’s what I call effective window shopping, y’all!! That cabinet is going to be amazing for china storage in Disa’s dining room! I love to mix in unexpected, re-purposed pieces like this into spaces. Y’all don’t have to limit yourselves when choosing furniture. Think about how you need the piece to function for you in your space, and then think of all the other options that are out there to serve that function in terms of furniture. Look at magazines and tear out pages for inspiration.
For Disa, I needed a china storage solution but I also wanted an industrial/metal element in the space. Instead of just jumping right onto the typical china hutch train, I thought about different storage pieces that could be re-purposed to hold china…and look hot in the process. Thus, a metal bookcase with glass- a feature that still speaks to actual china hutch origins- came to mind. The next obvious part of all this, as y’all have no doubt figured out, is finding these pieces. But that’s the best part, where all the shenanigans can be had- like getting your groove on in a Home Depot! Y'all can have tons of fun (and often SAVE big) by scouring unexpected places if you keep an open mind: junk shops like the one above, craigslist, ebay, thrift stores, flea markets and yard sales. Added bonus: when buying vintage or gently used furniture you're adding a layer of authenticity to your space that could be lacking if everything is store bought and brand new. Also, re-purposing gives you the flexibility to customize a piece to perfectly suit your needs. And custom-ness is next to Godliness, y'all! D.I.Y. yourselves!
So, Disa and I tore up some aisles on our first, but certainly not last, shopping excursion in the quest of fulfilling her dreams by way of her house re-design. And be sure to re-watch the video above...yes, I do look that good on camera as well as off, y'all, yet I'm also sharing a clever curtain rod treatment that will send you dancing to your nearest plumbing-parts store! uh-huh, I've just written rod and plumbing in the same sentence! Design Scandal! Now go get to shopping!
 One of the best dumpster dives I ever had was when I still lived on Status Island, NY (a.k.a. Staten Island)…yes, y’all, I called the oft-forgot borough home for three years! And what a sweet home it was… top floor a an old grain warehouse, at least 3500 sq feet of space... and my bedroom, which doubled as my rehearsal space was complete with ballet bars and a wall of mirrors! Strictly for rehearsals, ahem, of course! Oh shiot! Me and my creative partner, Alane, dubbed the place Chateau Monroe. She's still rockin' it there, click here for a peek at the fabulous pics she's taken of the Chateau!

Chateau is directly across the street from an elementary school, which provided more street side bounty than y'all can shake a stick at! One dive unearthed the locker pictured here. In perfect condition, aside from the random sticker & used stick of deodorant, this was a major score! Lockers (or any metal cabinets for that matter) always get me at “hello” for their industrial hotness and versatility as storage workhorses. The repurposing possibilities are endless! So, hello to my new DVD cabinet! This find was also extraordinary b/c almost a year earlier, Alane and I had found an identical locker at the same school! Now I had double locker love, y’all! Who doesn’t adore a twin?!
After a thorough scrub out I stripped the green paint using paint remover. Now, this is labor intensive beyond belief, y’all, but I love the look of unfinished steel and I’d already done the same treatment to the matching locker. Follow the included instructions on your paint remover can. You can also make the process as fast as possible with some power tool help. I used an electric sander and a sander drill attachment. Note: when using any kind of sand paper, you’ll get scratch marks in the steel or whatever metal you’re uncovering. But, to keep the marks at a minimum, remember that the finer the grade of sandpaper, the smaller the marks. Also, stripping the paint in the same direction and with the same amount of pressure to the power tool will keep the marks consistent and much less noticeable. If y’all are totally OCD and just can’t stand marks, then there’s always scraping the whole piece with a hand scraper. But y’all will definitely need to have some alcohol on hand for that process! Stripping paint is no joke, so to save the remainder of my sanity, I just kept the institutional green finish on the inside of the locker. No one cares what's going on inside when the outside looks so damn good, as witnessed in the glam opening shot!

Once stripped, I sealed the locker with Butcher’s Bowling Alley Wax. This amazing product seals the piece to prevent oxidization, or rust. It also leaves a really nice matte finish. If you don’t want to use wax, you can also use a polyurethane, but y’all can’t skip this step or you’ll RUSTgret it! Get it?! Oh genius!
Finally, I measured and prepped the locker for wood shelving, (which I had cut at Lowe’s). This involved drilling what seemed to be about 500 holes into both sides of the locker. These holes would accommodate the L brackets that would support my wood shelves. Make sure y’all measure twice on this part, b/c once you’ve drilled into metal, you can’t really patch it! Five shelves later, I’ve got industrial storage chic-ness that houses a massive movie collection, with growing room too!
Y'all, won't you fulfill my destiny by sharing some of your repurposed furniture goodness with me? Send an email to blog@pjmehaffey.com and I'll share in a future post. Take us there!