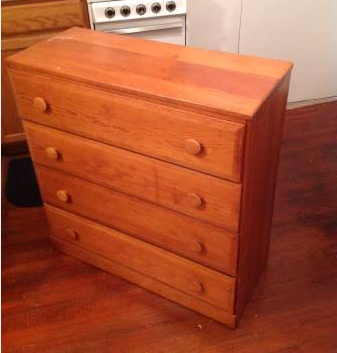
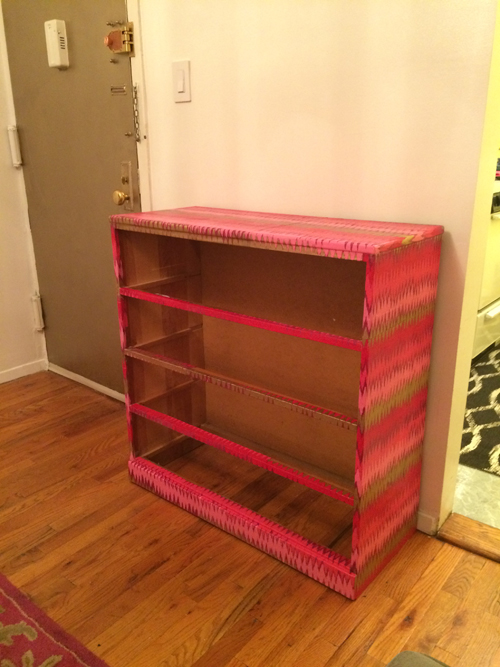
My client scored this ho-hum wood dresser off Craigslist, that we're using as an entryway console, a few weeks ago for $35, or some such value fabulousness:
Then I got my hands on it:
YASSSSSSSS! Totally style-slapped repeatedly about the face AND neck with this shiot, I MEAN:
THIS, my Dazzlerzzz, is the POWER OF DECOUPAGE. Here's how to do it:
*Get some ModPodge and the Mod Podge tool kit from your local craft store, like Michaels. Mod Podge is a glue that adheres, seals and protects surfaces. It dries clear, can be sanded and is just incredible. Note: Mod Podge comes in finishes, like gloss or matte. I prefer matte. You'll need painters tape, scissors and a paint brush too.
*Pick your paper. I used some left over art paper I had from a previous project. Y'all can really use whatever you want here: in the past, I've used comic book pages, wrapping paper, fabric...have even seen photos used.
*Paint out whatever areas you don't want to decoupage. I went ahead and painted the entire dresser b/c I wasn't sure I'd have enough of my leftover art paper to cover the entire piece. And I also lurv how the drawer fronts are a nice visual break from the bold pattern of the surrounding decoupaged areas. But if you've got the paper, or whatever material, you betta decoupage from top to bottom, left to right, Betch!
*Start with one area of your furniture and create a template for that area with your paper, like below. Major step. Y'all don't want to be in process, dripping Mod Podge all over AND trying to cut & place your paper. Mod Podge doesn't dry instantaneously, but y'all want to have some swiftness about y'all-selves. Creating your template beforehand helps you be swifty. Hmmmm k?
Kinda hard to see in this pic, but my paper template is on the bottom left. I've matched up the pattern already and used painters tape to lightly secure it. Remember, I had lots of random art paper pieces I had to frankenstein together, like a puzzle. Ideally, you'd have whole or larger sheets of art paper to work with. But if you don't, it's not a deal breaker, just requires more steps. And patience. Now, use your paint brush to apply a fair amount of Mod Podge directly to surface. Then apply paper, smooth out with hand.
*After about 10-15 mins, use the brayer, or roller tool to roll out air bubbles. Don't rush this step. The paper needs some time to 'settle' and adhere to Mod Podge BEFORE you roll out bubbles with roller. Next, brush on Mod Podge over the paper you just rolled. Here's a larger section I completed:
I repeated this process until the entire side was completed.
Btw, don't manic panic here: Mod Podge looks white when brushed on but dries clear. For the bottom of the dresser, I rolled the art paper overhang to crease it perfectly with the bottom of the dresser, like this:
Then I trimmed excess with scissors and applied more Mod Podge repeating the steps above. For the spaces between the drawers, I repeated the same technique described above:
And YES, I recommend hitting the spaces between the drawers. Details, sweeties, Details.
*For corners, or other areas of furniture where there's trim, or bump out panels, etc., let your art paper overhang. Then carefully trim with scissors, like so:
Btw, I like to use the squeegee tool, or flat credit-card looking tool, in these tighter, smaller spots to further flatten out any air bubbles. Y'all can use the roller, but it doesn't always get into the nooks and crannies of your furniture as easily.
Look at the bottom front dresser "leg"/corner and how I followed indentations of the furniture using the squeegee:
Fancy, right?! So basically, y'all just repeat these steps for the entire piece of furniture you're decoupaging and THAT'S IT. Oh and obvi, let dry. It's actually SUPER EASY to do. Remember to START with a layer of Mod Podge, do the paper and roller/air bubble thang and then FINISH with Mod Podge layer. Y'all can keep adding layer atop layer as much as you want here. And some peeps even sand to bring out more sheen/shine to the finish, but I like the look/feel of the matte finish when it's dried, AS IS.
*We scored some awesome vintage brass drawer pulls off Ebay and I even added a couple layers of Mod Podge to the painted drawer fronts, so the entire piece had a consistent look...let's review all this MAJESTY:
When in doubt...decoupage yo shiot OUT, y'all!!!


