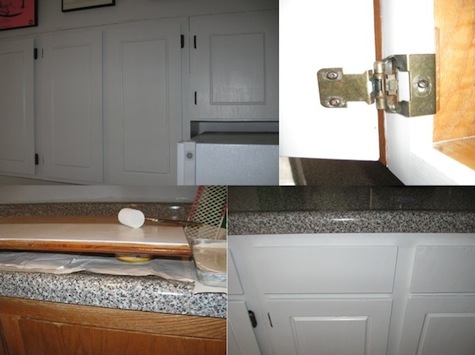
 Y'all, I'm well on my way to one sweet & sassy kitchen! The process has been smooth-sailing 'cause I'm totally in my 'paint place'-- that mindless, in-the-groove, itunes on, paintbrush-as-microphone place...we ARE a part of a Rhythm Nation, y'all! Sing it 'cause you want a better way of life-- through painted kitchen cabinets! And scene...
Y’all will notice I’m only painting the exterior doors and drawers. I wanted this process to be as easy and stress-free as possible. This may seem a little janky, but I don’t care how golden-y-oak the interiors are. For me, it’s all about the aesthetics on the outside…which, incidentally, also happens to be my philosophy about people. Oh shiot-- He didn’t? Oh, he DID y’all!
But, in all seriousness, painting your cabinets is probably the cheapest and easiest way to completely change the look of your kitchen, thereby giving you more drama than you can possibly ingest in one sitting. Just how dramatic you want to be is entirely up to you, but here’s how I’m getting my glam grove back into my cabinets:
1. Prep cabinets by giving them a light sanding and then a cleaning to remove dirt/dust. (Since I had thoroughly scoured my cabinets before—and in the process taken off most of the varnish, I didn’t need to sand them). Y'all can always opt out of sanding completely, b/c it's a total pain in the ass, but then you absolutely have to use the primer product detailed in step 3.
- Tip: To avoid even MORE work, just slide contents in cabinets towards the back rather than completely emptying them out.
2. Remove cabinet doors and drawer faces. Then remove hinges...I opted to tackle one section, or “box” at a time, for space-saving & sanity purposes. (FYI, your cabinets are actually separate, box-like structures, some with doors, some with drawers & some with a combo of both)
- Tip: Be sure to have a labeling system for all these components…last thing you want to do is lose any hardware or get cabinet doors mixed-up.
3. Prime everything that you’ll eventually want painted with one coat of BIN Primer Ultimate Stain Blocker made by Zinsser. I have no clue what this stuff is made of and it will most likely be around long after any of us are, but it’s amazing! It completely covers any and all imperfections AND apparently eliminates having the need for any sanding whatsover! The can even says it covers “fire, smoke and water” damage, for those of y’all who have cabinets that have been REALLY rode hard. I used a 2” foam roller, following the grain of wood. Where necessary, I used smaller, craft foam “brushes” in hard to reach areas.
- Tip: Cat food or any kind of canned goods make great "risers" when painting cabinet doors and drawer faces. Use four of the same size canned goods and you've got the perfect elevation in which to tackle the edges of doors and drawers. Drips are janky, so watch yourselves y'all!
- Another Tip: Avoid paintbrushes and rollers drying out. I'm using two different paintbrush/roller sets, one for primer & one for actual paint. At the end of my day, I wrap each set in saran wrap and place in the freezer. Uh-huh, I wrote freezer, y'all. After a few minutes of thawing out, the sets are fresh and ready to be re-used the next day.
4. Once primer coat has thoroughly dried, it’s time for the paint. I used Benjamin Moore’s Ben Premium Semi-gloss Interior Latex Paint in White. Same situation with the foam brushes and going in the same direction of wood. Once paint is completely dry, carefully replace all hardware and just gently run your fingers over your freshly painted work, experiencing a 'tender caresses' decorating moment like you wouldn't believe. YOU did this! Savor and be satisfied!

